
Want to delete your viewing history on Netflix? In this article, we will guide you with how you can clear your viewing history on Netflix.
Netflix is an online streaming platform that has a vast library of movies, TV shows, documentaries, and original content while offering a diverse range of options to cater to a global audience.
It has a user-friendly interface that allows its subscribers to explore various genres, create personalized profiles, and curate watchlists to their preferences.
Additionally, Netflix keeps track of all the content you stream using your Netflix account. This viewing history can be accessed, used, and deleted using the steps provided in this article. Let’s discuss how you can delete your viewing history on Netflix.
What is Netflix’s Viewing History?
Netflix viewing history is a valuable resource that can help you find more TV shows and movies that you will enjoy. Viewing history on Netflix consists of all the TV shows and movies that you have watched using your Netflix account.
It keeps track of all the content you stream on Netflix. Netflix uses this viewing history to make recommendations to you based on what you have already watched.
It is easy to manage your Netflix viewing history by following the details given further in this article.
| 🟢RELATED ARTICLES |
|---|
| ➤Cuentas de Netflix gratis baratas con contraseña y correo July 18, 2026 |
| ➤250+ Contas Netflix grátis login e senha July 18, 2026 |
How to Access Your Viewing History?
To view your viewing history on Netflix, you can follow the steps given below:
- Go to Netflix and sign in to your account.
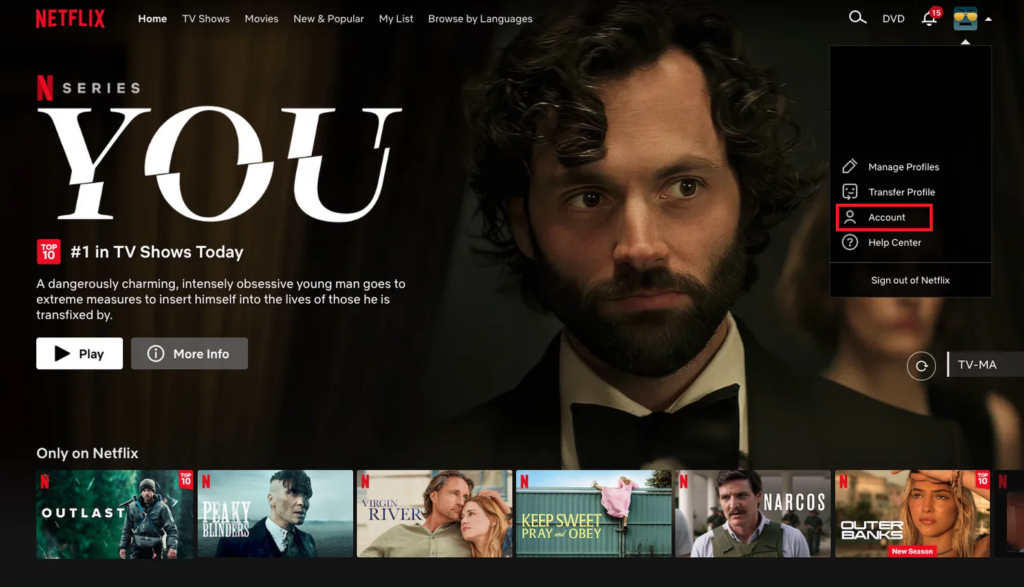
- Click on your profile icon in the top right corner of the screen.
- Select Account.
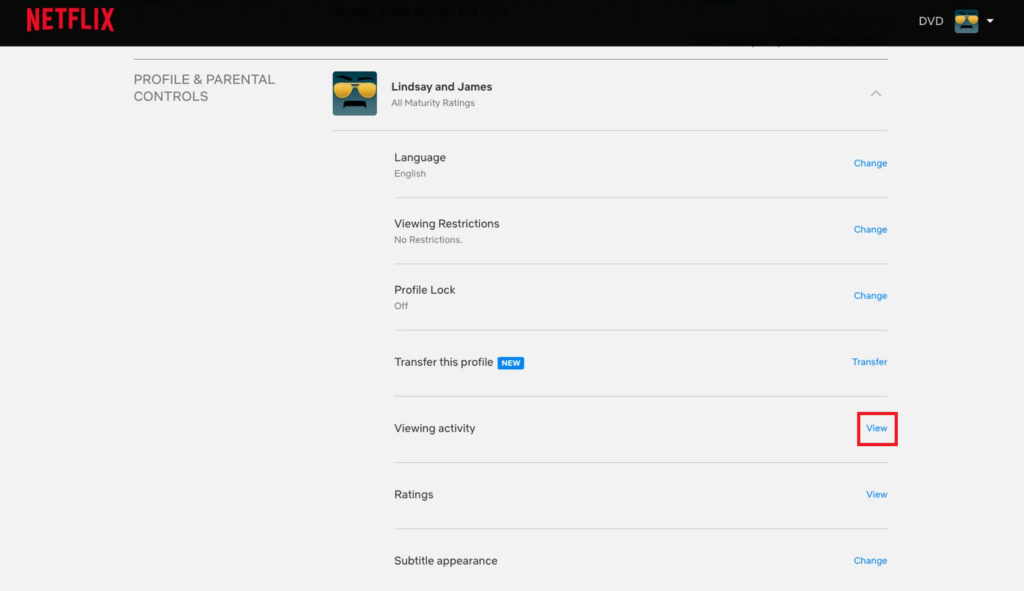
- Under the Profile & Parental Controls section, look for Viewing activity; click on View next to Viewing Activity

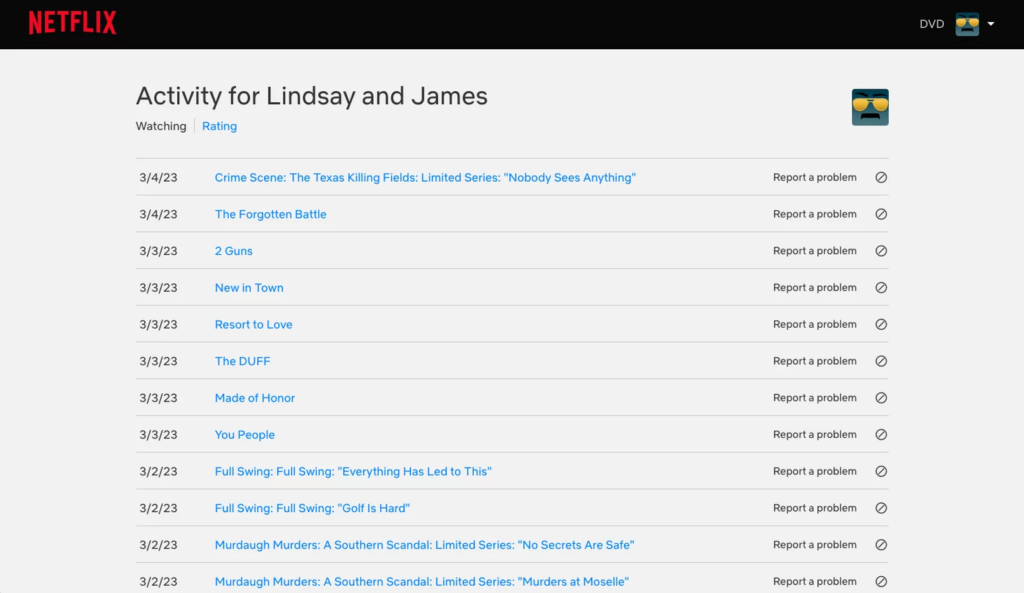
- This will show you your viewing history.
- You can export your viewing history to a spreadsheet. To do this, go to the Viewing Activity page and click the Download All button.
How to Delete Your Viewing History on Netflix?
If you want to delete your Netflix viewing history on Netflix, but don’t know how to do so then you can follow the steps given below to do so-
Using Netflix Website:
- Go to the Netflix website and sign in to your account.
- Click on your profile icon in the top right corner of the screen.
- Select Account from the drop-down menu.
- Scroll down to the Profile & Parental Controls section and click on the profile you want to delete the viewing history for.
- Click on the View option next to the Viewing Activity.
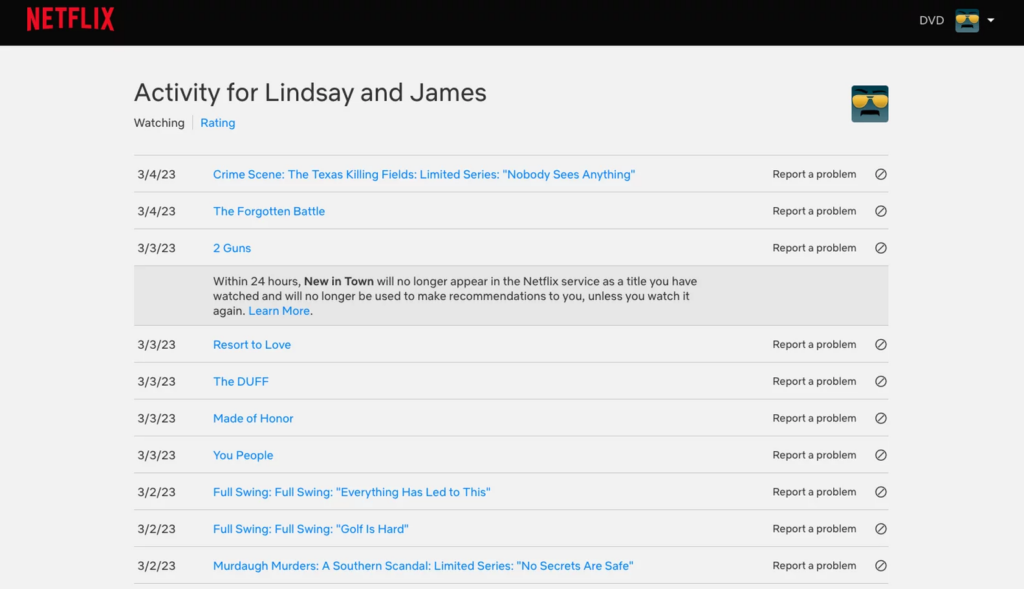
- Click on the Hide icon next to the title or episode you want to delete.
- If you want to delete an entire show, click the Hide Series button.
- To delete your viewing history, scroll to the bottom of the page and click on the Hide All button.
- Click on Yes to confirm the action.
Using the Netflix App:
- Open the Netflix app on your device and ensure that you’re logged in.
- Tap on the menu icon (usually three horizontal lines) in the upper left corner.
- Scroll down and select Account.
- Under the My Profile section, tap on Viewing activity.
- You can click the Hide button next to the title you want to remove. The selected title will now be successfully hidden from the Netflix Viewing History.
Why Netflix Stores My Viewing History?
Netflix stores your viewing history for the following reasons-
- Viewing activity: Netflix lists all the TV shows and movies that you have watched on your account. You can sort your viewing activity by date, title, or genre.
- Recommendations: Netflix uses your viewing activity to make recommendations to you. You can see the recommendations that Netflix has for you on the “Recommended for you” page.
- Hide titles: You can hide titles from your viewing history if you don’t want them to show up in your recommendations.
- Download your viewing history: You can download a list of your viewing history to a spreadsheet. This can be helpful if you want to keep track of what you have watched or if you want to share your viewing history with someone else.
FAQs
1. How to Hide A Title From Your Viewing History on Netflix?
If you want to hide a title from your viewing history, you can do so by clicking on the “Hide” icon next to it.
If you hide an episode, you will also have the option to hide the entire series. To hide all of your viewing history, you can select the “Hide all” option at the bottom of the page.
2. Why does Netflix Keep Track of My Viewing History?
Netflix keeps track of your viewing history so that it can make recommendations to you based on what you have already watched.
This way, you are more probable to see TV shows and movies that you will enjoy and the recommended content is more likely to suit your Netflix streaming taste.
3. Can I Delete My Viewing History?
Yes, you can delete your viewing history on Netflix. To do this, go to the “Viewing activity” page and click on the “Hide all” option at the bottom of the page.
This will delete all of your viewing history, including any titles that you have hidden.
4. Can I Hide Specific Titles from My Viewing History?
Yes, you can hide specific titles from your viewing history. To do this, go to the Viewing activity page and click on the “Hide” icon next to the title that you want to hide.
This will hide the title from your viewing history, but it will still be visible to Netflix when it makes recommendations to you.
Conclusion:
Netflix viewing history is a powerful tool that can be used to improve your viewing experience. By keeping track of what you have watched, Netflix can make recommendations to you that are more likely to be relevant to your interests.
You can also use viewing history to hide titles that you don’t want to show up in your recommendations or to download a list of your viewing history to a spreadsheet. You can easily do all this by following the steps provided in the article.